Artist: Lau Po Shin (樓寶善, 楼宝善)
Part 1 – Design and Aquatint Technique
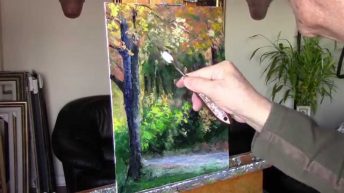
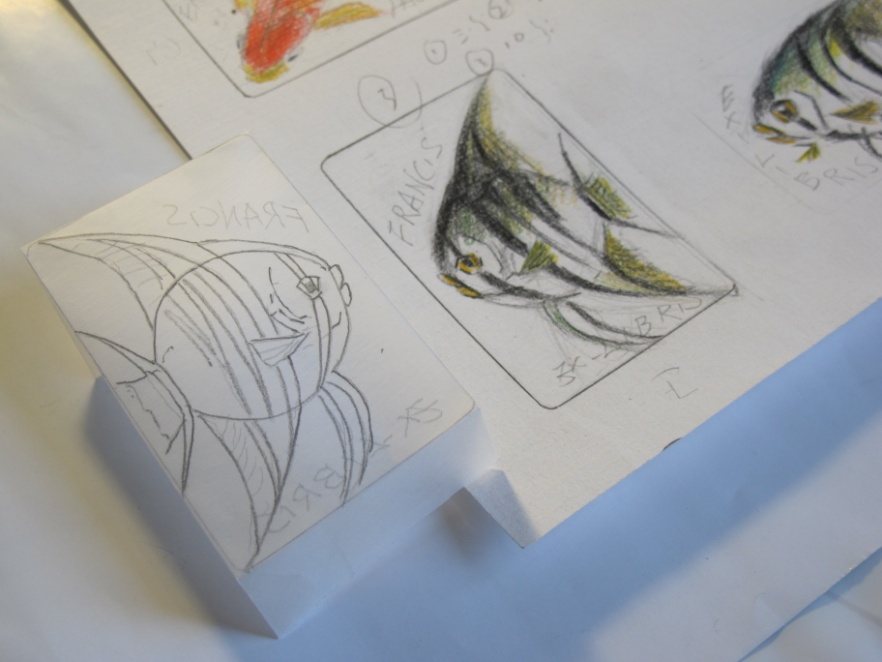
1.1 – Draw a Sketch of the etching
Draw a sketch of the etching considering the dimension of the copper plate that will be used for the printing process.

For a good result, we usually pass the paper under the press-printing machine for a maximum of around 3 to 4 times. For this, you should not use too much colors and limit it to around 3 different colors.
1.2 Copy the Drawing on a Tracing Paper
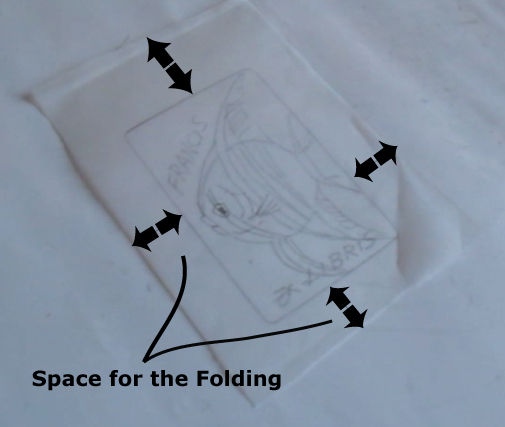
Leave some extra space around the drawing on the tracing paper for it to be folded to go around the copper plate. Copy the drawing on a tracing paper with a HB pencil.
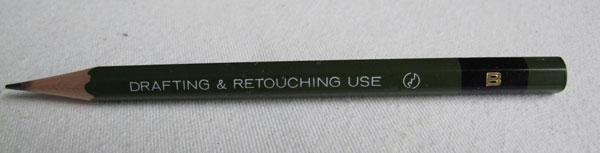
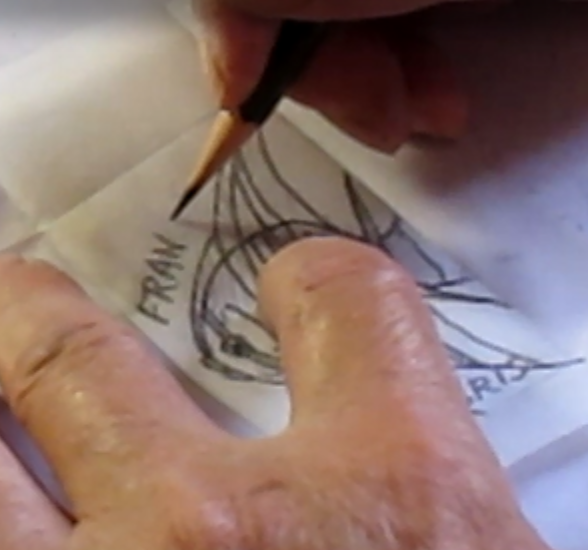
1.3 Trace the Lines with a Pencil Darker than the HB Grade
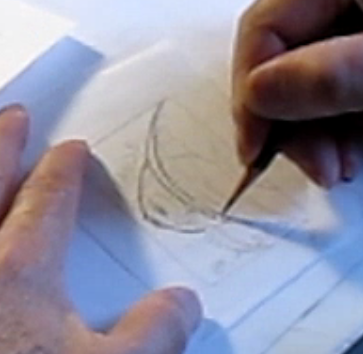
Go over the lines of the drawing on the tracing paper with a pencil of a grade higher than HB.The tracing paper will be used to trace the design on the copper plate.
Use a pencil with a grade of HB or higher so we can see the lines on the copper plate when we copy the design using the tracing paper. We used a pencil with B grade.
1.4 Fold the Tracing Paper to Fit the Copper Plate
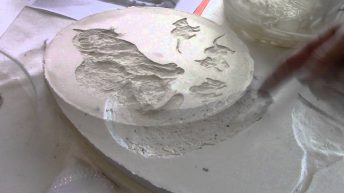
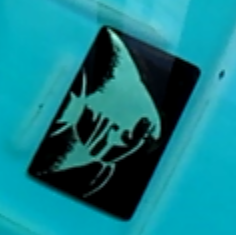
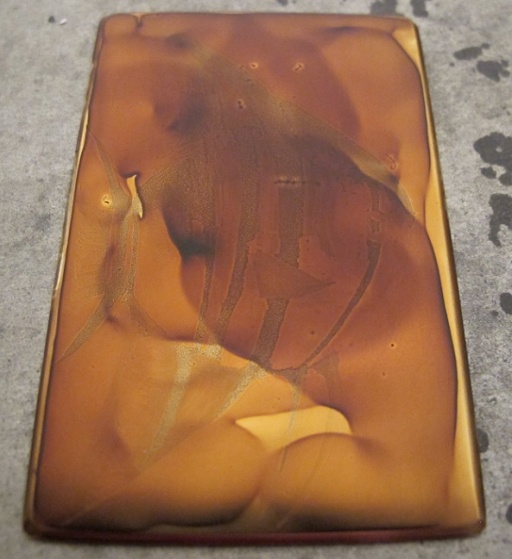
1.5 Use the Aquatint Technique to Create a Tonal Effect
Unlike the Engraving Technique where a needle is used to create lines, the Aquatint Technique uses powdered rosin, an acid resistant material, that is heated to create a tonal effect.
Without an Aquatint box, the powdered rosin can be applied manually by hand.


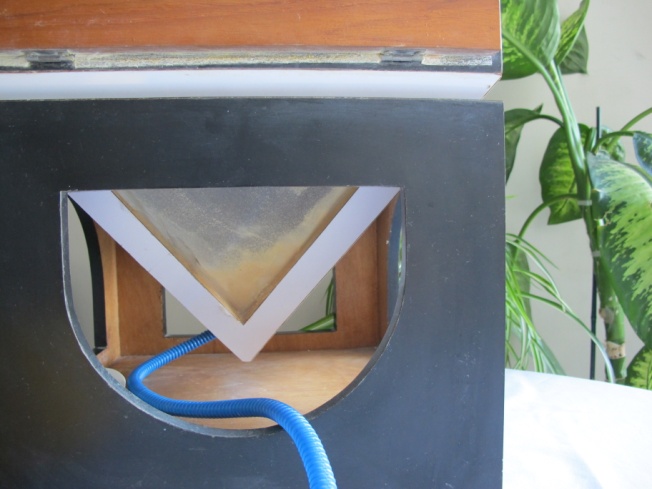
Step 1: Place powdered rosin in the Aquatint Box.
Step 2: Pump air in the Aquatint Box to create a dust of rosin floating inside the box.
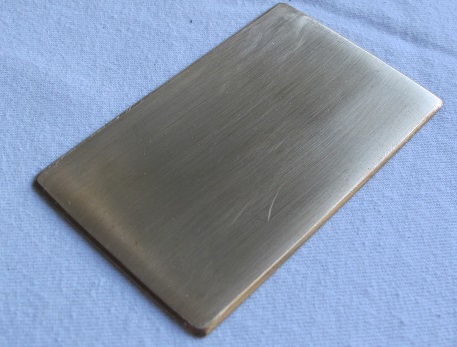
Step 3: Put the copper plate in the Aquatint Box.
Step 4: Wait for around 5 minutes, the time that the Rosin lays on the copper plate.
Step 5: Take the copper plate out of the Aquatint Box.
Step 6: Inspect if the rosin is evenly laid on the copper plate.
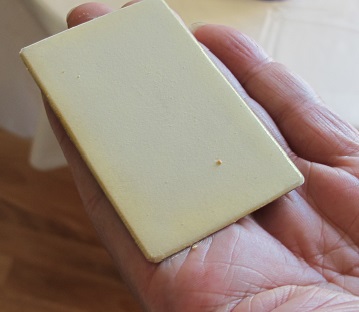
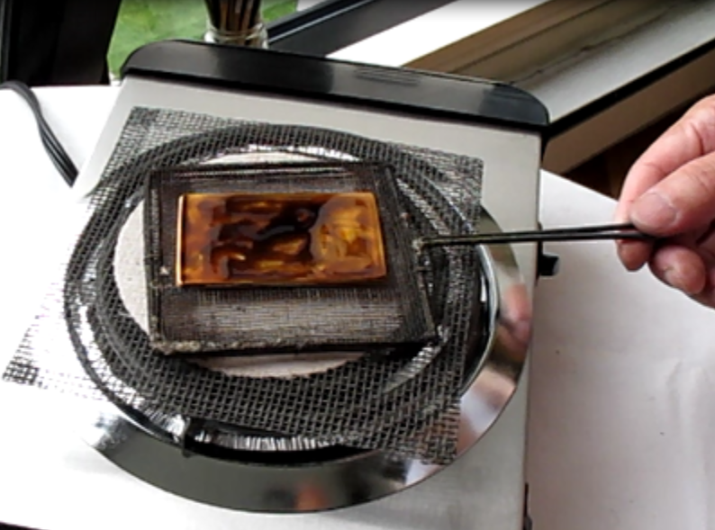
Step 7: Heat the copper plate.
Step 8: When you see that the rosin has melted, becoming darker, turn off the heat.
Step 9: Inspect the copper plate and the melted rosin.
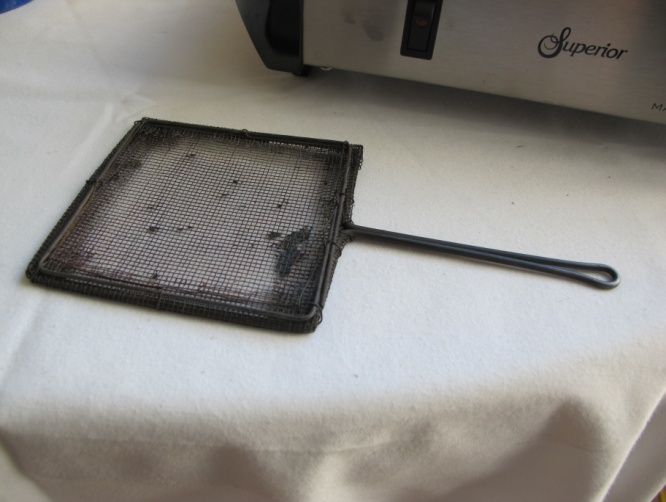
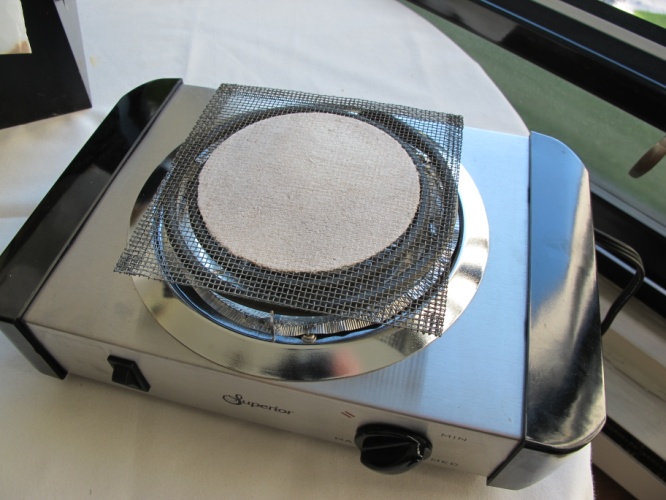
Use a heat grid to evenly distribute the heat over the copper plate during the heating process.
Part 2 – Etching of the First Layer
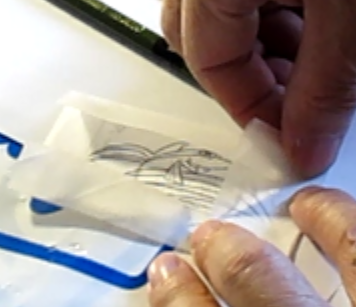
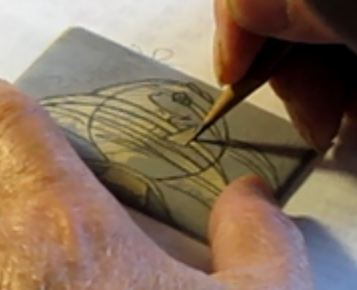
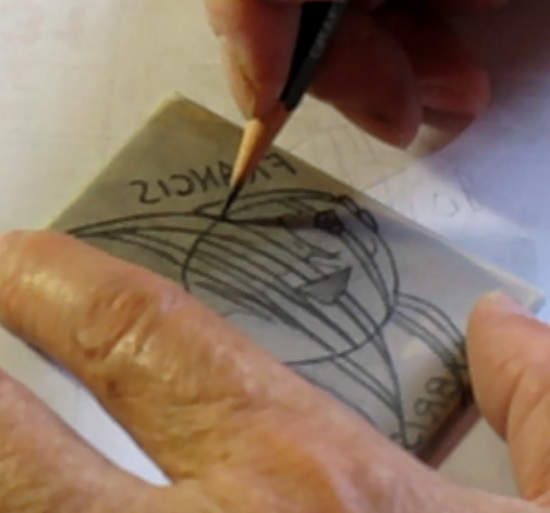
2.1 Trace the Design on the Copper Plate
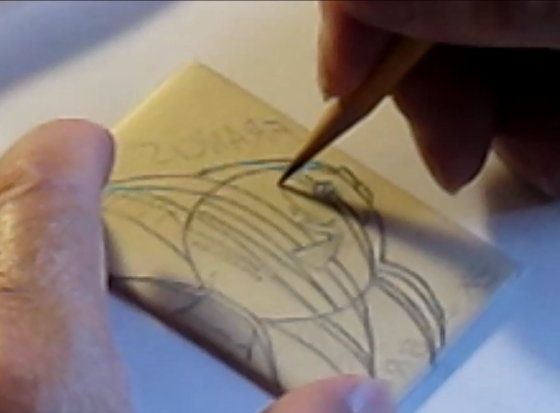
Step 1: Fold the tracing Paper with the design on the reverse side around the copper plate.
Step 2: Use a pencil to draw the lines on the tracing paper to copy them on the copper plate.
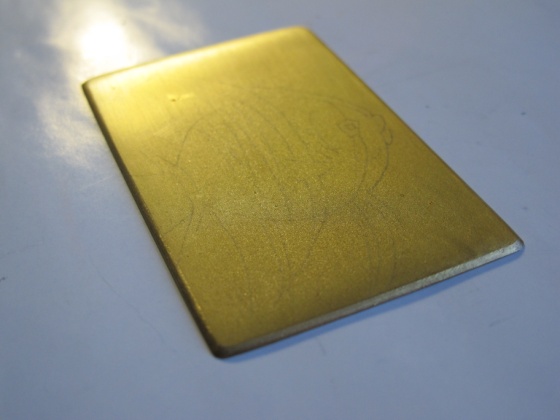
Step 3: Unfold the tracing paper
Step 4: Inspect the copied lines
2.2 Detail the Plan of the Etching Process
Step 1: Define the white area where etching is not needed
Step 2: Determine the number of prints needed depending on the colors and lines

The printing order is based on the tone of the colors. We print the lighter colors first and the darker colors last.
| First Print | Layer 1: Yellow |
| Second Print | Layer 2: Green |
| Third Print | Layer 3: Black |
| Fourth Print | Black Lines and Words |
2.3 Protect the White Area where Etching is not needed with Varnish

2.4 Plan the Etching Steps by Defining the Different Colors Areas
For each print, etching is needed to create the lines of colors. The lines of the first layer of color are lighter whereas the lines of the last layer are more profound.
For darker colors, in order for the plate to retain more ink during the printing process, we leave the copper plate in the acid solution longer. The etched area will then be deeper.
Taking into account the above criteria, the etching time is as follow:
| Etching time | Etching time (Total) | |
| Yellow | 2 minutes | 2 minutes |
| Blue* | 3 minutes | 5 minutes ( 2 + 3 ) |
| Black | 5 minutes | 10 minutes ( 2 + 3 + 5 ) |
| Lines and Words | 5 minutes | 5 minutes |
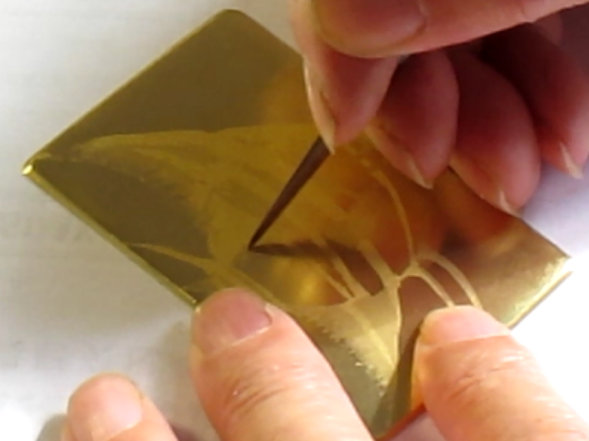
2.5 Trace the Major Lines on the Copper Plate
To define the different colors areas, paying attention to the first layer, the yellow area, trace the major lines on the copper plate.
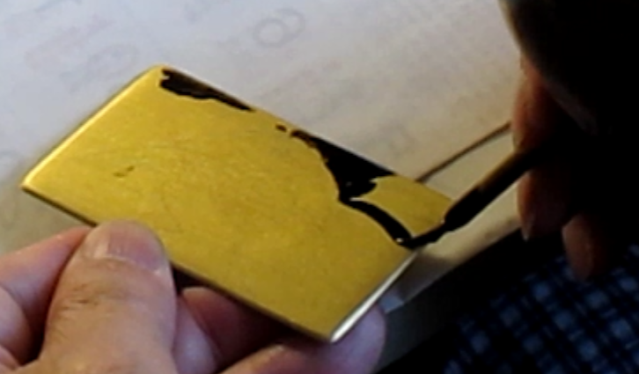
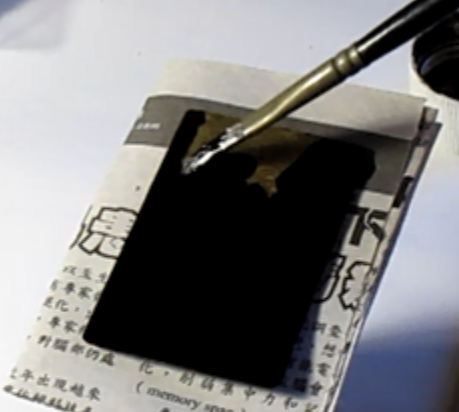
2.6 Put Varnish on the White Area of the Design where Etching is not Needed
Define areas in the design where etching is not needed and cover them with varnish.
2.7 Put Varnish on the Back and the Edge of the Copper Plate
To protect the back and the edges of the copper plate from the acid during the etching process, these areas have to be protected with varnish.
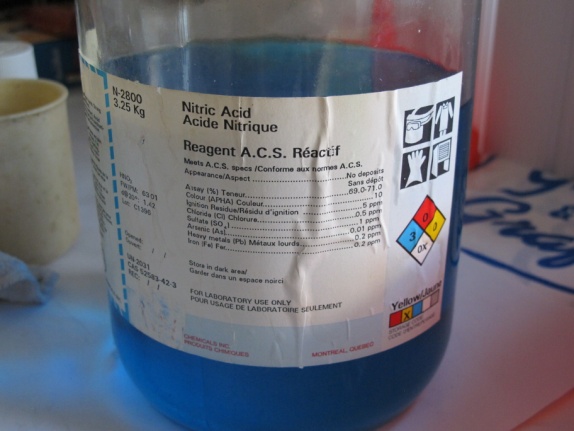
2.8 Prepare the Acid Solution
A concentration of ¼ Acid Nitric is added to ¾ of Water.
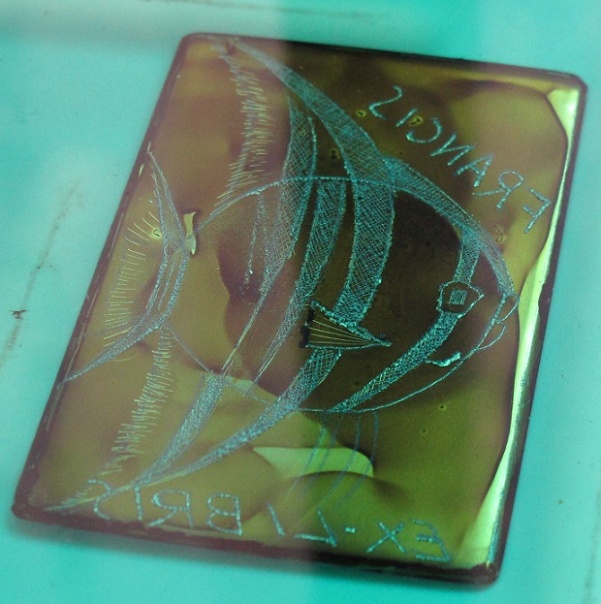
2.9 Put the Copper Plate in the Acid
To etch the lines and area for the yellow layer, the copper plate is placed in the acid for 2 minutes.
During the etching process, bubbles are formed on the area exposed to acid.
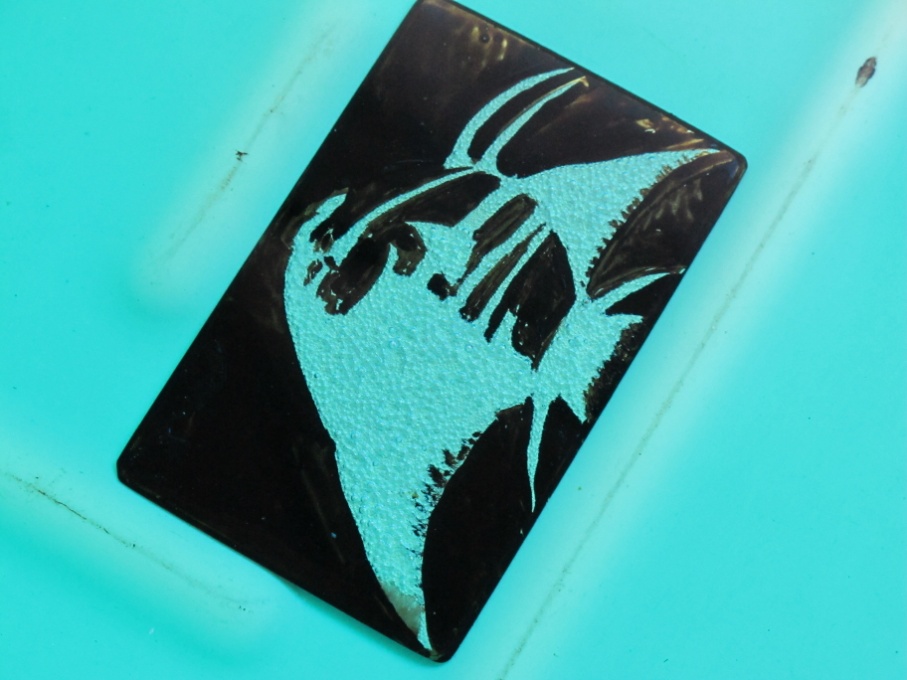
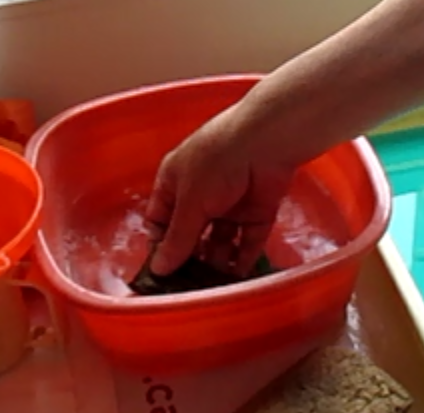
2.10 Put the Copper Plate in Water and Dry it
2.11 Inspect the Etching Result
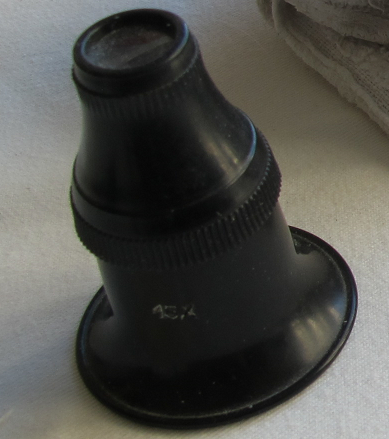
Inspect with a microscope to see if the etched area are profound enough.
Part 3 – Etching of the Second and Third Layer
3.1 Trace the Lines of the Second Layer on the Copper Plate
Trace the lines for the second layer, the green area, on the copper plate with the tracing paper.

3.2 Put Varnish to Protect the Yellow Area from Etching
To etch the second layer for the green area, the yellow area has to be protected with varnish.
3.3 Put the Copper Plate in the Acid, Wash with Water and Dry it
To etch the lines and area for the green layer, the copper plate is placed in the acid for 3 minutes. (With the etching of the first layer that lasted 2 minutes, it will be a total of 5 minutes of etching for the second layer.)
After the etching process, put the copper plate in water to wash away the acid and dry the copper plate.
3.4 Trace the Lines of the Third Layer
Trace the lines for the third layer, the black area, on the copper plate with the tracing paper.
3.5 Put Varnish to Protect the Green Area from Etching

To etch the third layer for the black area, the green area has to be protected with varnish.
3.6 Put the Copper Plate in the Acid, Wash with Water and Dry it

To etch the lines and area for the black layer, the copper plate is placed in the acid for 5 minutes. (With the etching of the first layer that lasted 2 minutes and the etching of the second layer that lasted 3 minutes it will be a total of 10 minutes of etching for the third layer.)
After the etching process, put the copper plate in water to wash away the acid and dry the copper plate.
3.7 Inspect the Etching Result
Inspect with a microscope to see if the etched area is profound enough. If the etched area is not profound enough, put the copper plate back into the acid.
3.8 Put Away the Acid Solution
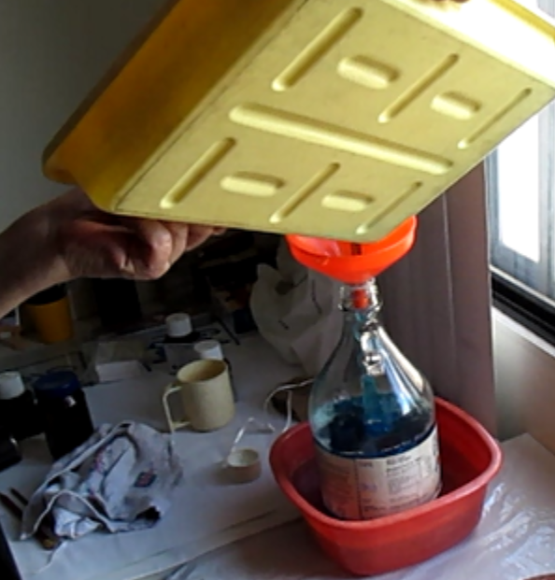
Acid solution is very dangerous. When not needed, put the acid solution back in a container
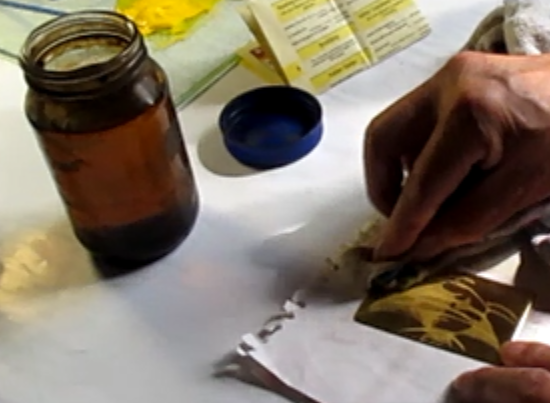
3.9 Wipe Away the Varnish with the Resin Solution
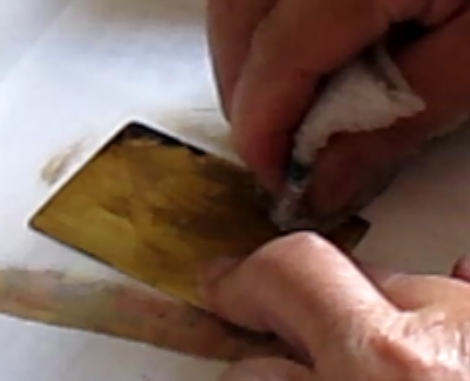
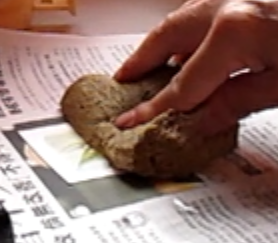
Use a towel dipped into resin solution to wipe away the varnish on the copper plate.
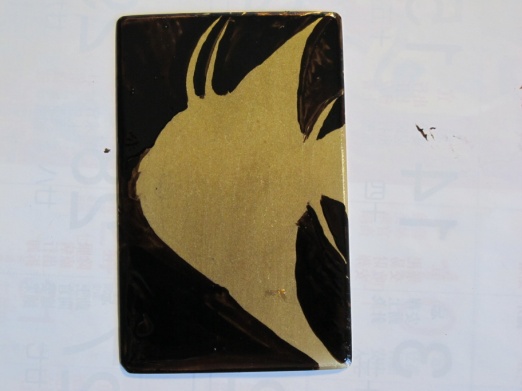
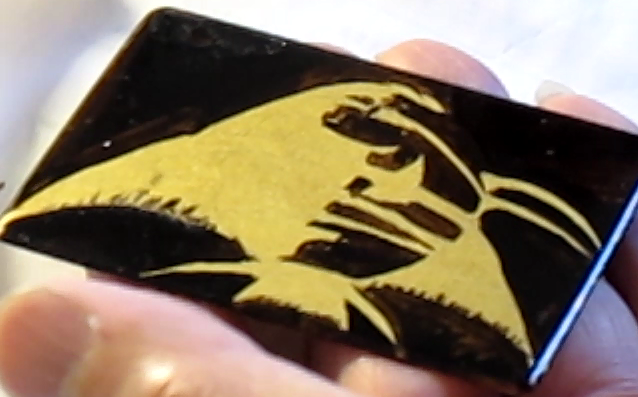
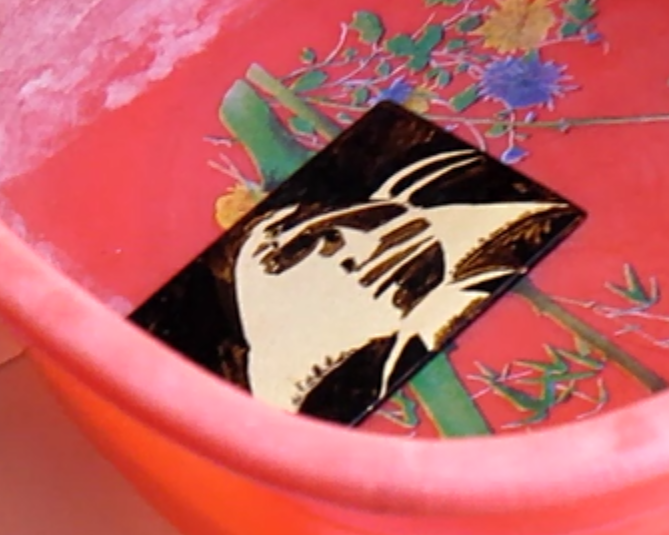
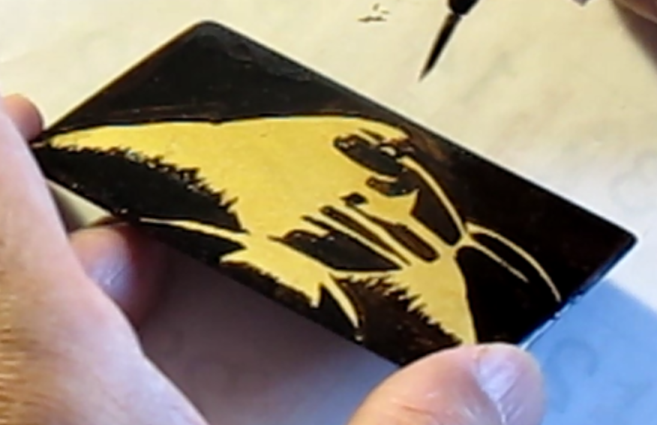
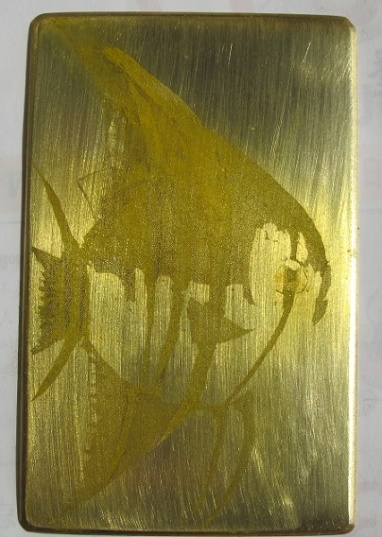
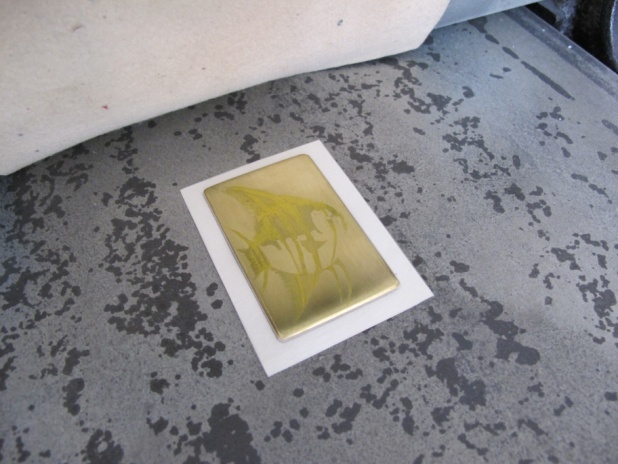
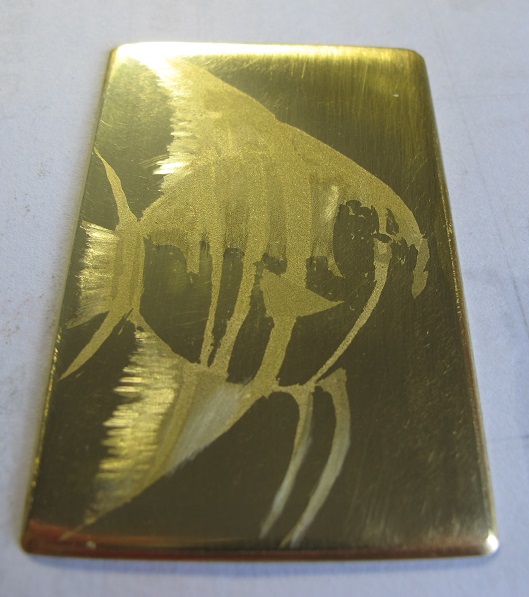
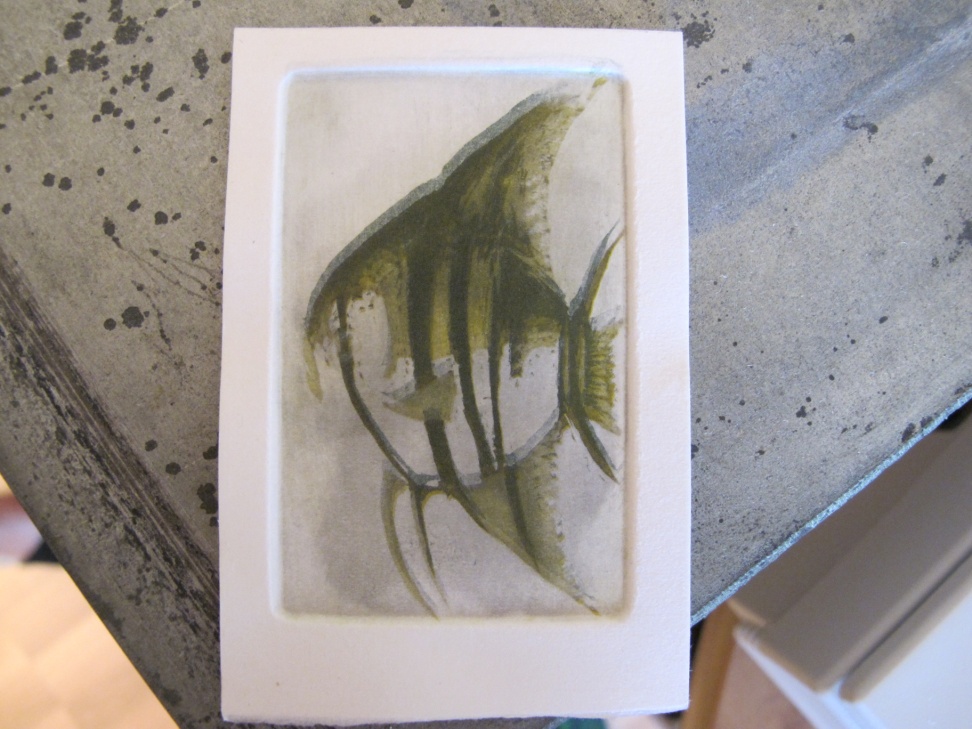
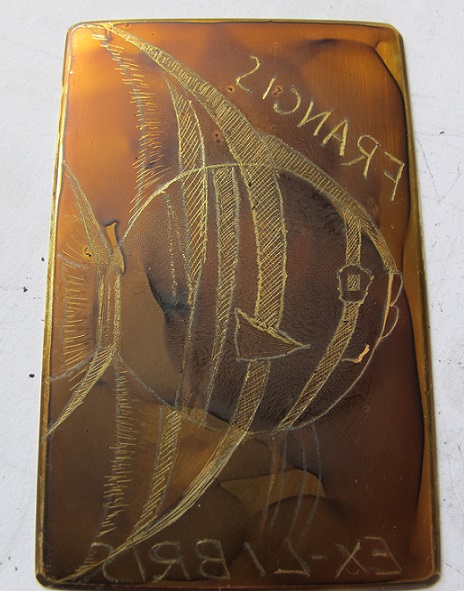
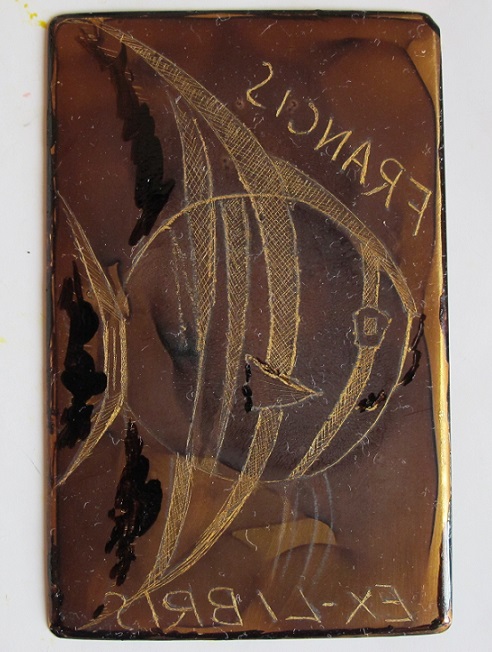
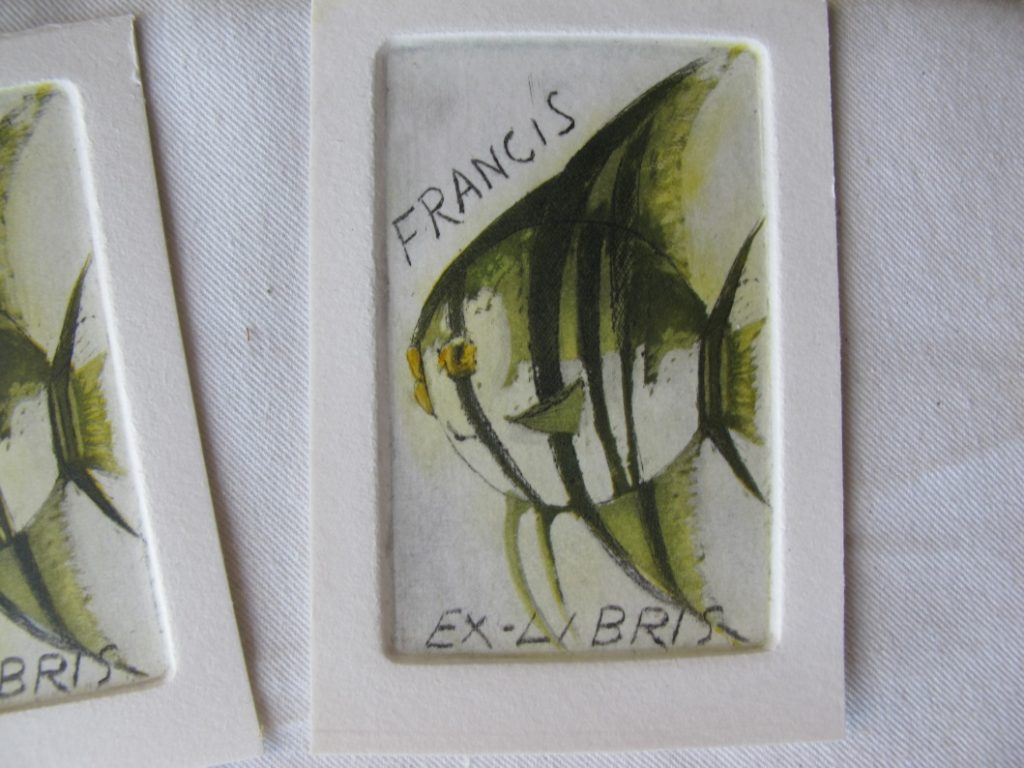
3.10 Result of the Etching Process
Here is the result after the etching of the first, second and third layer.
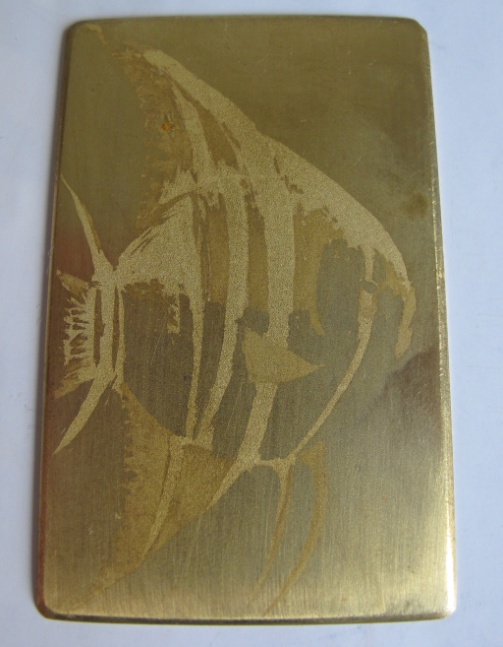
The copper plate is ready for the printing process.
Part 4 – Print the First Layer: Yellow Ink
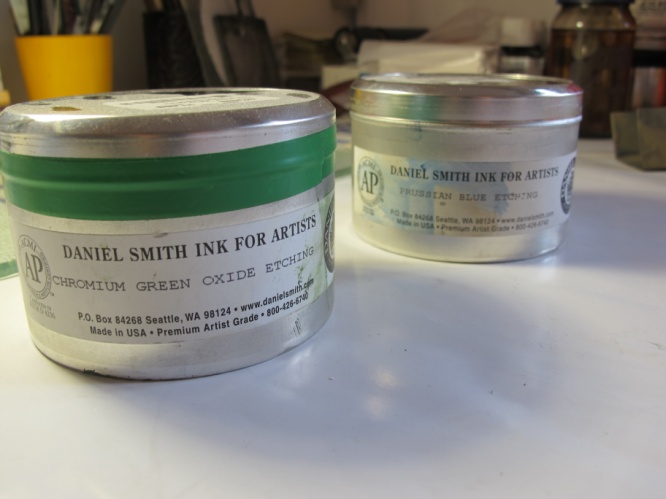
4.1 Mix the Yellow Etching Ink
To obtain the desired color, it is possible to mix different ink.
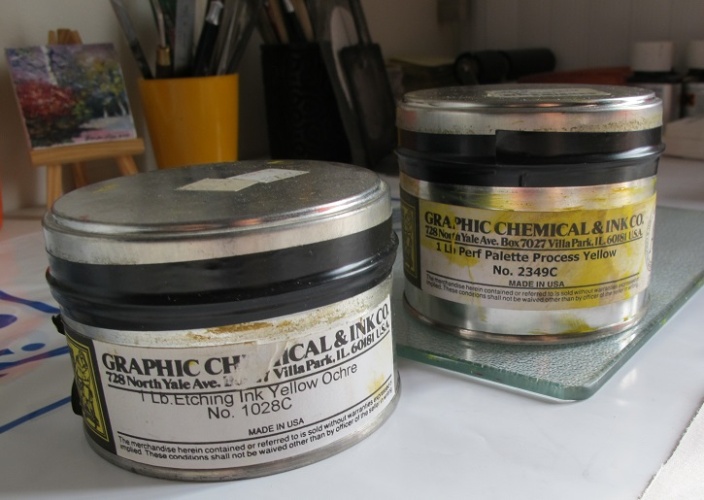
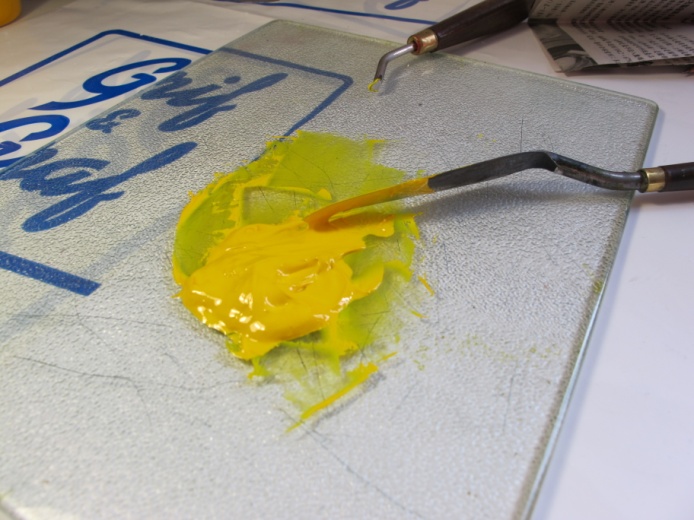
For our yellow color, we’ve mixed yellow etching ink and orange oil paint. This mixture will provide a less thick ink which will be easier to apply and wipe away.
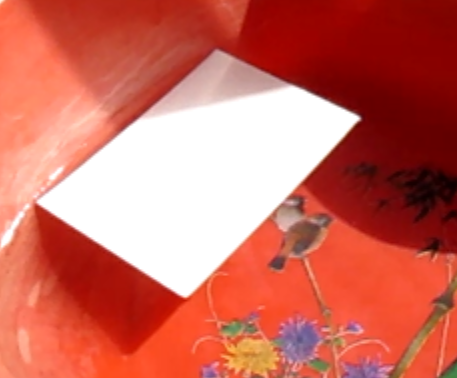
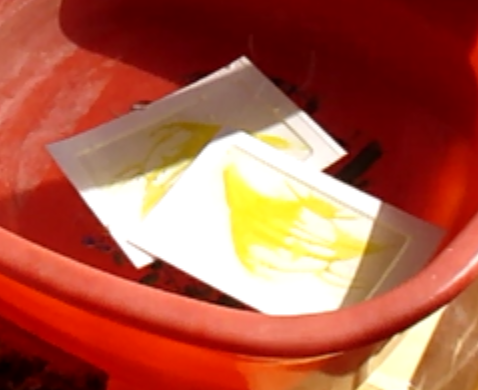
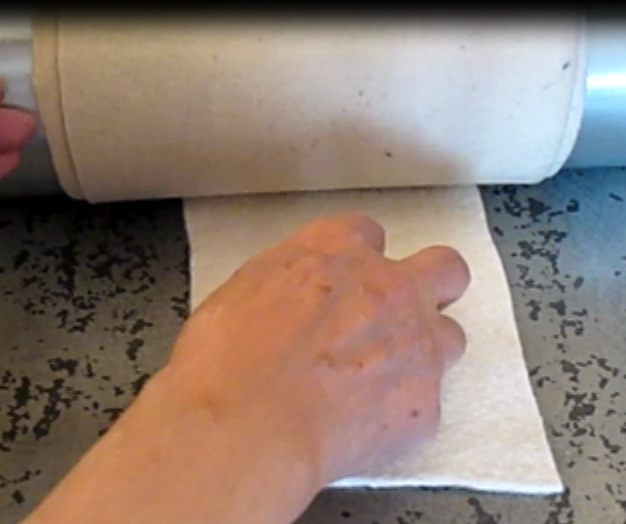
4.2 Put an Etching Paper in the Water
Paper suitable for etching requires several characteristics mainly due to the fact that the paper needs to be submerged in water and has to be passed through the press many times under strong pressure.
The main characteristics of an etching paper are:
- Versatile
- Absorbent
- Durable
- Sizable
- Acid Free
- Light-fastness
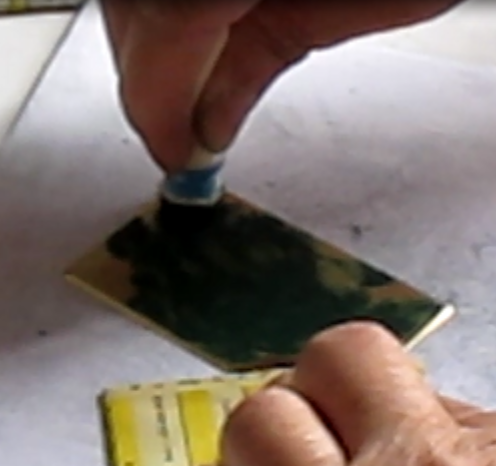
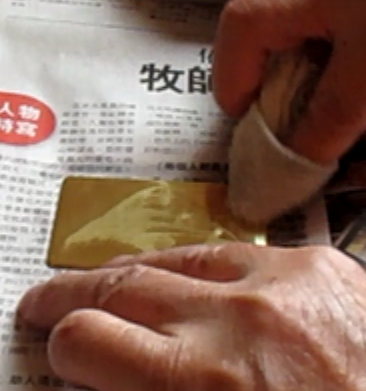
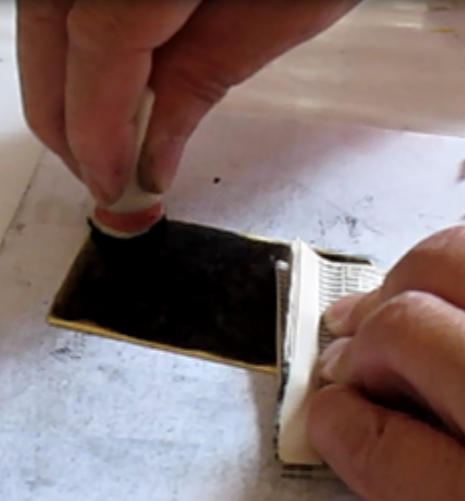
4.3 Dab the Yellow Ink on the Copper Plate
Use a cloth to dab the yellow ink on the copper plate.
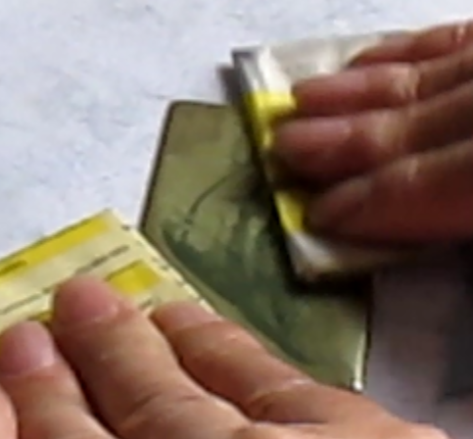
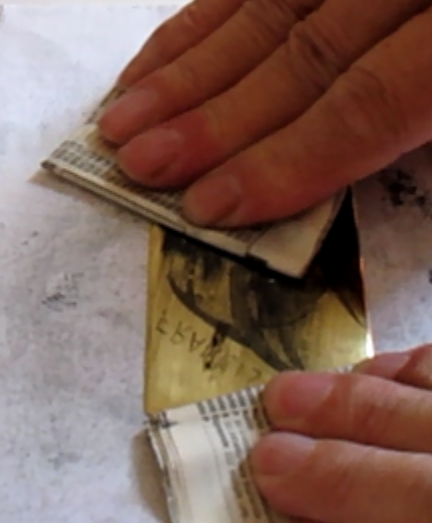
4.4 Wipe the Yellow Ink on the Surface of the Copper Plate
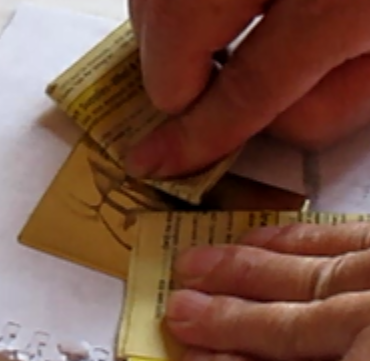
Use papers to wipe away the exceeding yellow ink on the surface of the copper plate to only keep the needed amount of ink for the printing.

You can use Yellow Pages as the wiping papers. However, avoid any papers that have strong colors because it may be mixed with the printing ink.
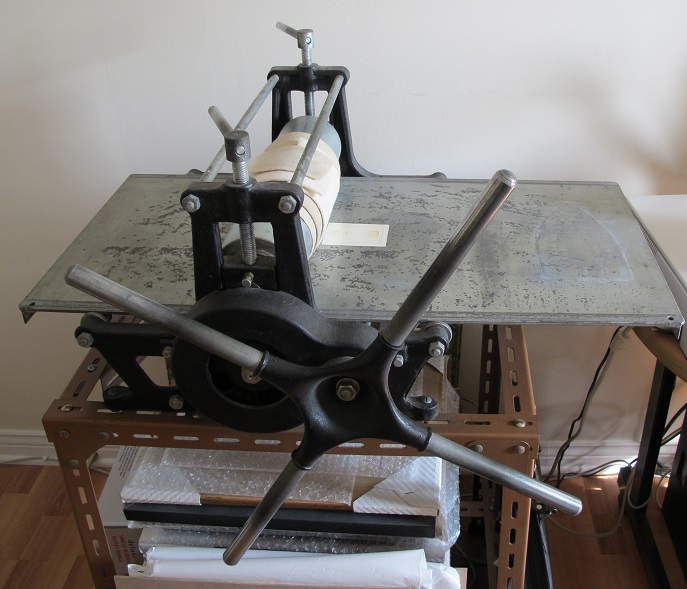
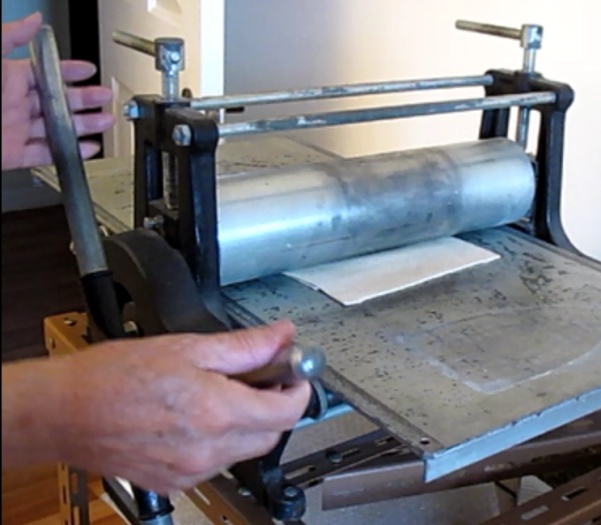
4.5 Print the First Layer with the Press-Printing Machine
To align the copper plate on the press-printing machine, it is possible to use a paper mark with the dimension of the copper plate to ensure that the copper plate is placed properly.
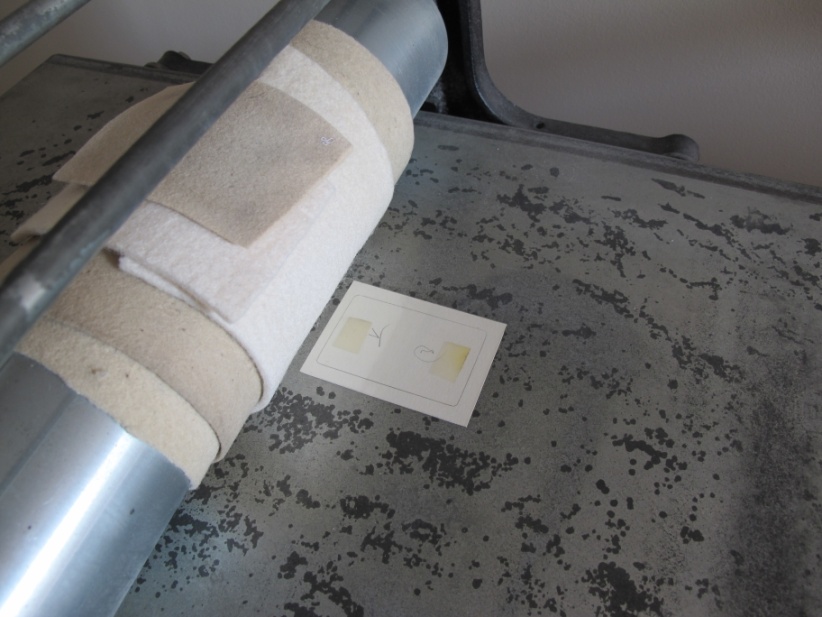
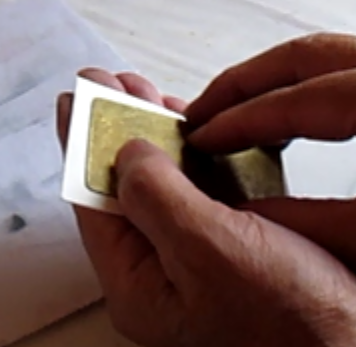
Step 1: Put the copper plate on the press-printing machine on a paper mark.
Step 2: Take the etching paper out of the water bowl and wipe the exceeding water with a sponge.
Step 3: Put the etching paper on the copper plate.
Step 4: Cover the etching paper and copper plate with several layers of cloth.
Step 5: Activate the press-printing machine to roll over the etching paper twice against the copper plate.
Step 6: Take away the layers of cloth.
Step 7: Pick up the etching paper.
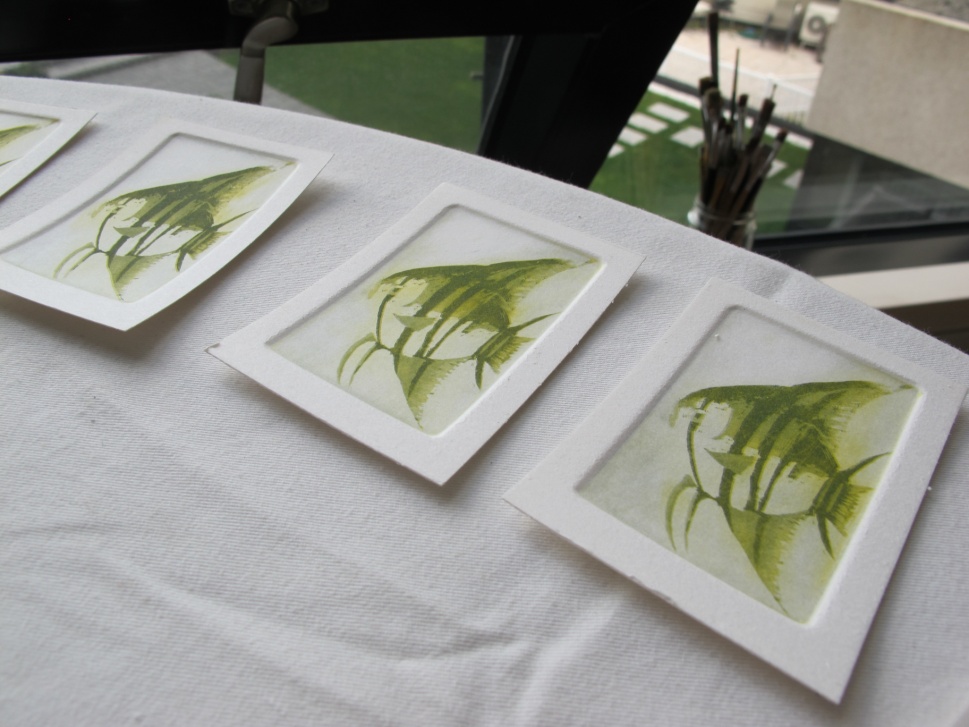
Step 8: Place it on a table for it to dry naturally.
Roll over the etching paper and copper plate twice for a better result
Between prints, a resin solution can be used to clean the copper plate to allow a more even printing color.
Part 5 – Print the Second Layer: Blue Ink
The first layer is printed with yellow ink. To obtain a green color, the second layer will be printed with blue ink. (yellow + blue = green).
5.1 Clean the Copper Plate with the Resin Solution
Clean away the previous printing color from the copper plate with resin solution.
5.2 Carve and Polish the Copper Plate for the Second Layer Printing
To enhance the lines in order to provide more details during the printing process, sand paper and engraving cutter are used to polish and carve the copper plate.
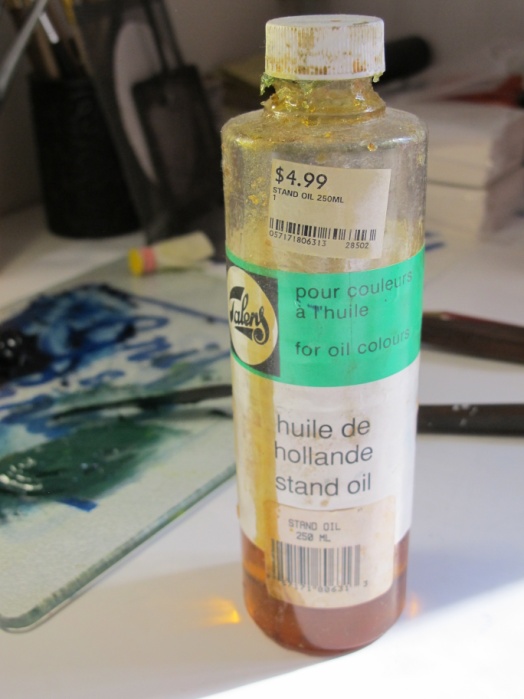
5.3 Mix the Blue Etching Ink
To obtain the desired color, it is possible to mix different ink. To reduce the thickness of the ink, stand oil can be added to the ink mixture.
5.4 Put the Paper with the First Layer in the Water
5.5 Dab the Blue Ink on the Copper Plate
Use a cloth to dab the blue ink on the copper plate.
5.6 Wipe the Blue Ink on the Surface of the Copper Plate
Use papers to wipe away the exceeding blue ink on the surface of the copper plate to only keep the needed amount of ink for the printing.
5.7 Print the Second Layer with the Press-Printing Machine
Step 1: Take the etching paper printed with the first layer out of the water bowl and wipe the exceeding water with a sponge.
Step 2: Put the etching paper on the copper plate.
Step 3: Put the etching paper and the copper plate on the press-printing machine.
Step 4: Cover the etching paper and copper plate with several layers of cloth.
Step 5: Activate the press-printing machine to roll over the etching paper twice against the copper plate.
Step 6: Take away the layers of cloth.
Step 7: Pick up the etching paper.
Step 8: Place it on a table for it to dry naturally.
Part 6 – Print the Third Layer: Black Ink
6.1 Polish the Copper Plate for the Third Layer Printing
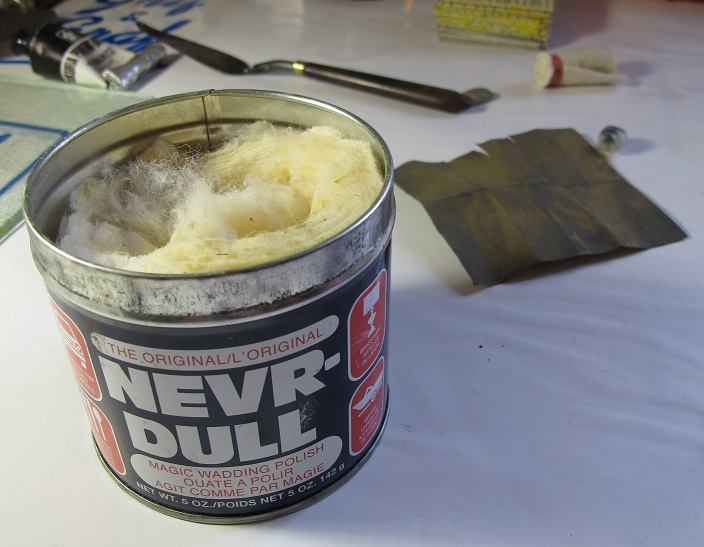
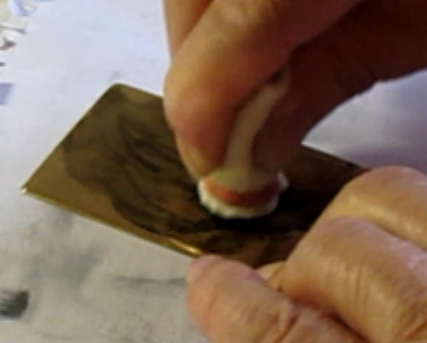
The lines of the second layer printing are not needed for the third layer printing. To take away the carved lines created during the second layer printing, we will polish the copper plate with wadding polish.

After the polishing, clean the copper plate with the resin solution.
6.2 Put the Paper with the Second Layer in the Water
Put the paper with the second layer in the water to prepare for the third printing process.
6.3 Mix the Black Etching Ink and Dab the Black Ink on the Copper Plate
Use a cloth to dab the black ink on the copper plate.
6.4 Wipe the Black Ink on the Surface of the Copper Plate
Use papers to wipe away the exceeding black ink on the surface of the copper plate to only keep the needed amount of ink for the printing.
6.5 Print the Third Layer with the Press-Printing Machine
Step 1: Take the etching paper printed with the second layer out of the water bowl and wipe the exceeding water with a sponge.
Step 2: Put the etching paper on the copper plate.
Step 3: Put the etching paper and the copper plate on the press-printing machine.
Step 4: Cover the etching paper and copper plate with several layers of cloth.
Step 5: Activate the press-printing machine to roll over the etching paper twice against the copper plate.
Step 6: Take away the layers of cloth.
Step 7: Pick up the etching paper.
Step 8: Place it on a table for it to dry naturally.
Part 7 – Etching of the Final Lines and Words
7.1 Clean the Copper Plate with the Resin Solution
To prepare the copper plate for the etching of the final major lines and words, the copper plate needs to be cleaned with the resin solution.
7.2 Put Varnish on the Copper Plate
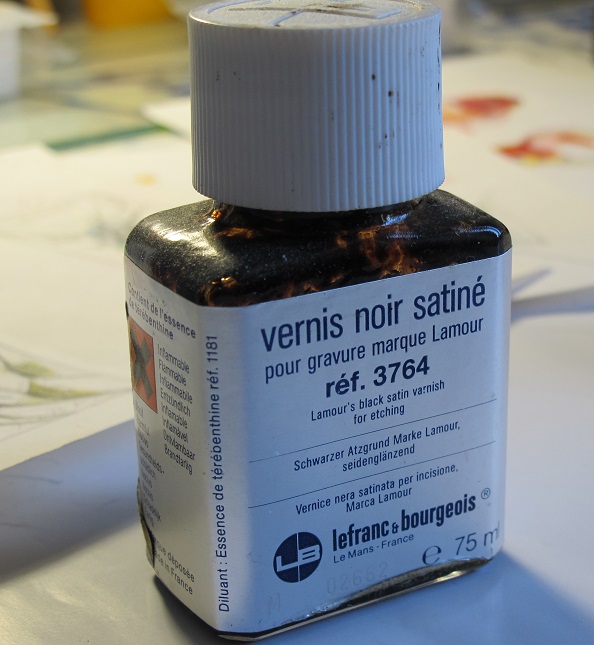
To prepare the copper plate for the etching process, the copper plate has to be protected with Varnish. Unlike the etching of the layers of colors, the etching of the final lines and words need to be carved with an engraving cutter. To do so, a satin varnish is used instead.

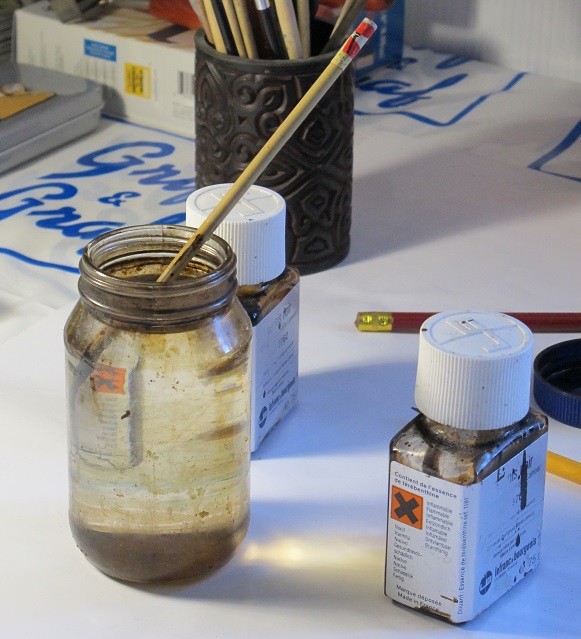
To clean the brush easier, put it in the resin solution right after usage.
7.3 Heat the Copper Plate
Before being used, satin varnish needs to be heated.
7.4 Draw the Lines that need to be Etched on the Tracing Paper
Use a pencil higher than HB grade to trace the lines and letters on the tracing paper.
7.5 Trace the Lines on the Copper Plate
Place the tracing paper, in reverse order, on the copper plate and trace the lines and letters on the tracing paper so that they are visible on the copper plate.
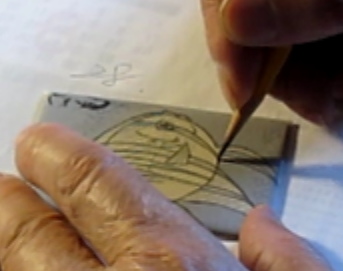
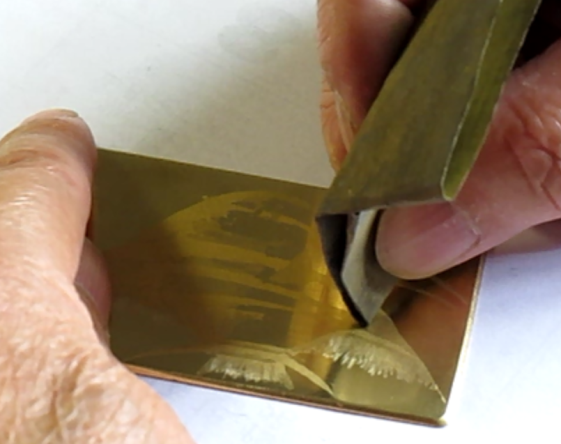
7.6 Carve the Lines on the Copper Plate
Carve the lines and words on the copper plate with an engraving cutter.
7.7 Put Varnish to Protect the Edges and the Back of the Copper Plate from the Acid
Put varnish to protect the edges and back of the copper plate or any imperfections during the carving process from the acid.
7.8 Put the Copper Plate in the Acid Solution
To etch the final lines and words, the copper plate is placed in the acid for 5 minutes.
7.9 Put the Copper Plate in the Water and Dry it
Put the copper plate in water to wash away the acid solution and dry it with a towel.
For more profound lines, protect the other areas and repeat the etching process. When done, clean the copper plate with the resin solution to wipe away the varnish.
7.10 Put the Etching Paper with the Third Layer in the Water
Put the etching paper printed with the third layer in the water to prepare it for the printing process.
7.11 Dab the Black Ink on the Copper Plate and Wipe Away the Excess Ink
Clean the edges of the copper plate with a towel dipped in the resin solution to protect the etching paper from the ink left on the edges by mistake during the printing process.
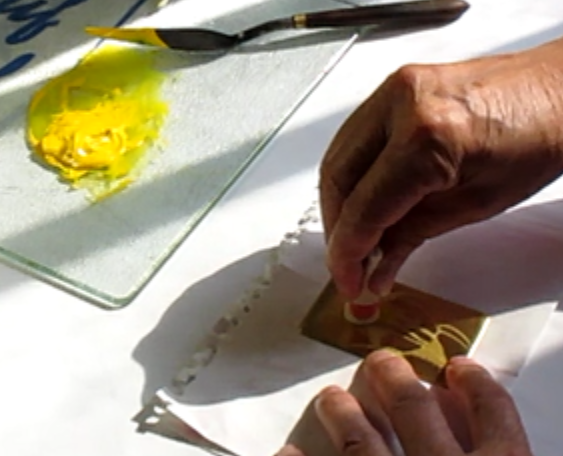
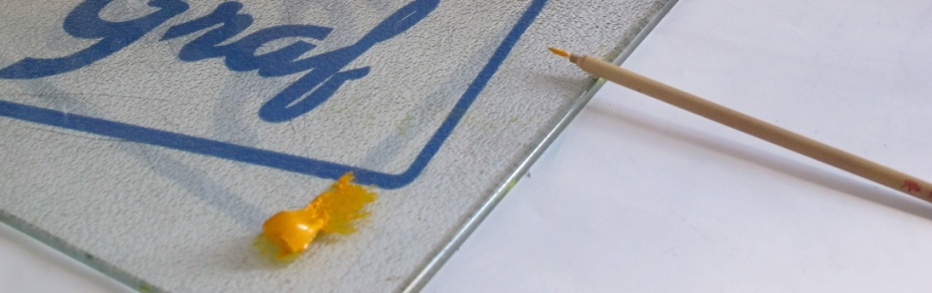
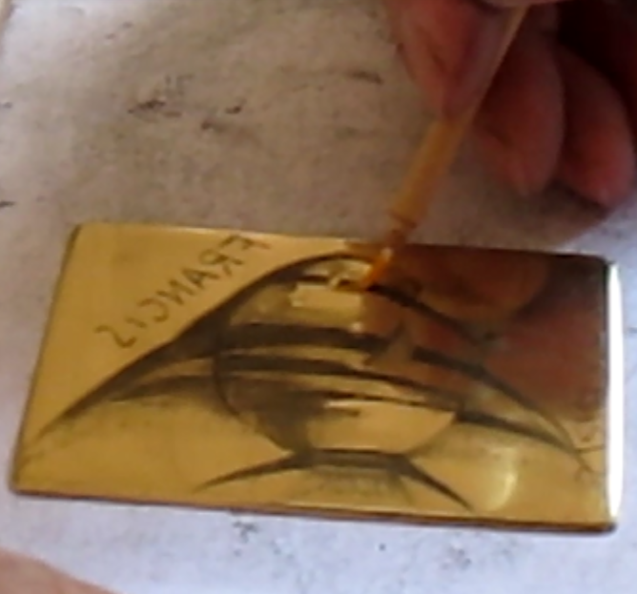
7.12 Put Yellow Ink on the Copper Plate for the Eye and Mouth of the Fish
For any small details during the final prints (ex: color of the eye or mouth), the color can be added directly on the copper plate with a brush.
7.13 Print the Final Lines and Words with the Press-Printing Machine
Step 1: Take the etching paper printed with the third layer out of the water bowl and wipe the exceeding water with a sponge.
Step 2: Put the etching paper on the copper plate.
Step 3: Put the etching paper and the copper plate on the press-printing machine.
Step 4: Cover the etching paper and copper plate with several layers of cloth.
Step 5: Activate the press-printing machine to roll over the etching paper once on the copper plate.
Step 6: Take away the layers of cloth.
Step 7: Pick up the etching paper.
Step 8: Place it on a table for it to dry naturally.
To print the final lines and words, it is better to only press the etching paper only once on the copper plate to avoid any misprints during the process.
7.14 Inspect the Final Prints
Look over all the final prints and eliminated those that are not perfectly printed. Prints are eliminated for the following reasons:
- Differences in Colors
- Etching Paper Condition
- Alignments
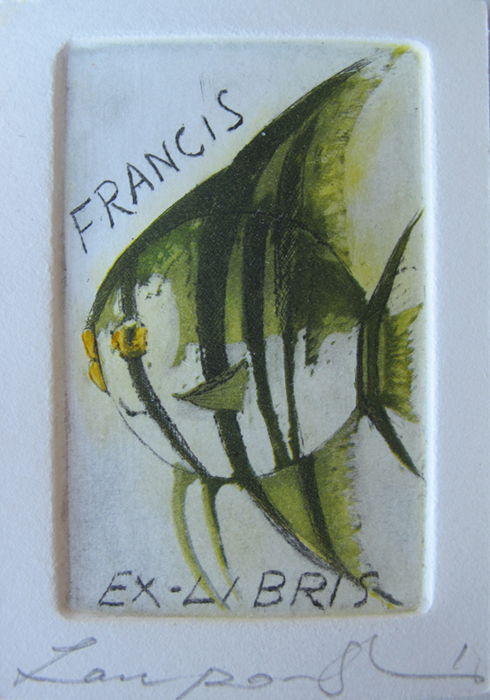
7.15 Apply Numbers of Print and Signature on the Final Prints
We usually do not apply the number of prints on Ex Libris. However, it can be interesting for collectors to know the total of prints. Because of this, the number of prints can be applied on the back of the Ex Libris.
Thank you so much !
It was our pleasure to work on this project. We believe that authentic art is very precious and is worth all the admiration. However, the work and effort behind every artwork somehow, most of the time, remained unknown. Because of this, we believe that it is important to present the techniques and processes behind the creation of an art to you all. It will allow us to admire art in a unique way
There is a story behind every artwork, for you to discover.